Happy Easter! I hope you enjoyed your day and spent it with people you care about.
We celebrated with my family yesterday, then enjoyed a chill day at home today with yummy food on the lawn and some simple Easter baskets.
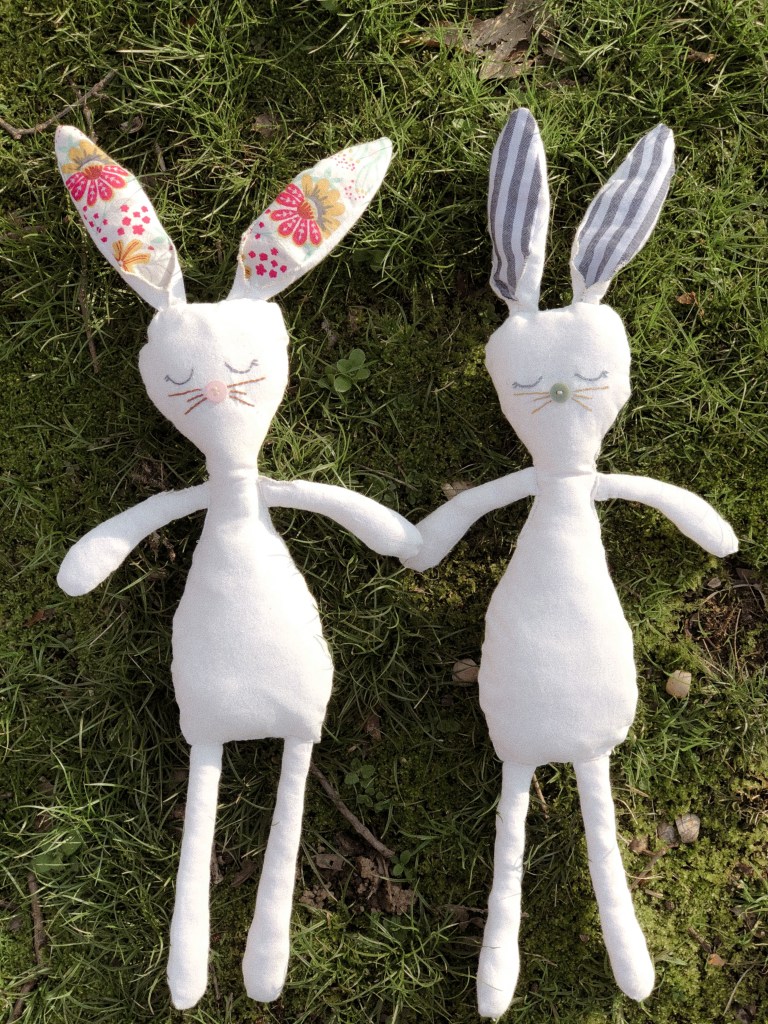
And here are the upcycled bunnies I made the kids while I sat elevating my leg this week! I wanted something made out of natural materials (details below), low cost, and I hoped it would make them smile.
When choosing simple, slow, ethical/secondhand options for my kids on holidays I sometimes wonder if I’m doing enough. Is it exciting enough? Do they feel loved and celebrated? Do they need more things??
And always always, the answer is – it is enough. There are so many studies about simplicity and the calming effect it has on children. How having fewer things actually ignites the imagination and acts as a catalyst for play

They know they are loved by the words we speak in our home, the memories we make together, the snuggles, the read alouds, the shared meals and conversation, the space to be completely themselves.
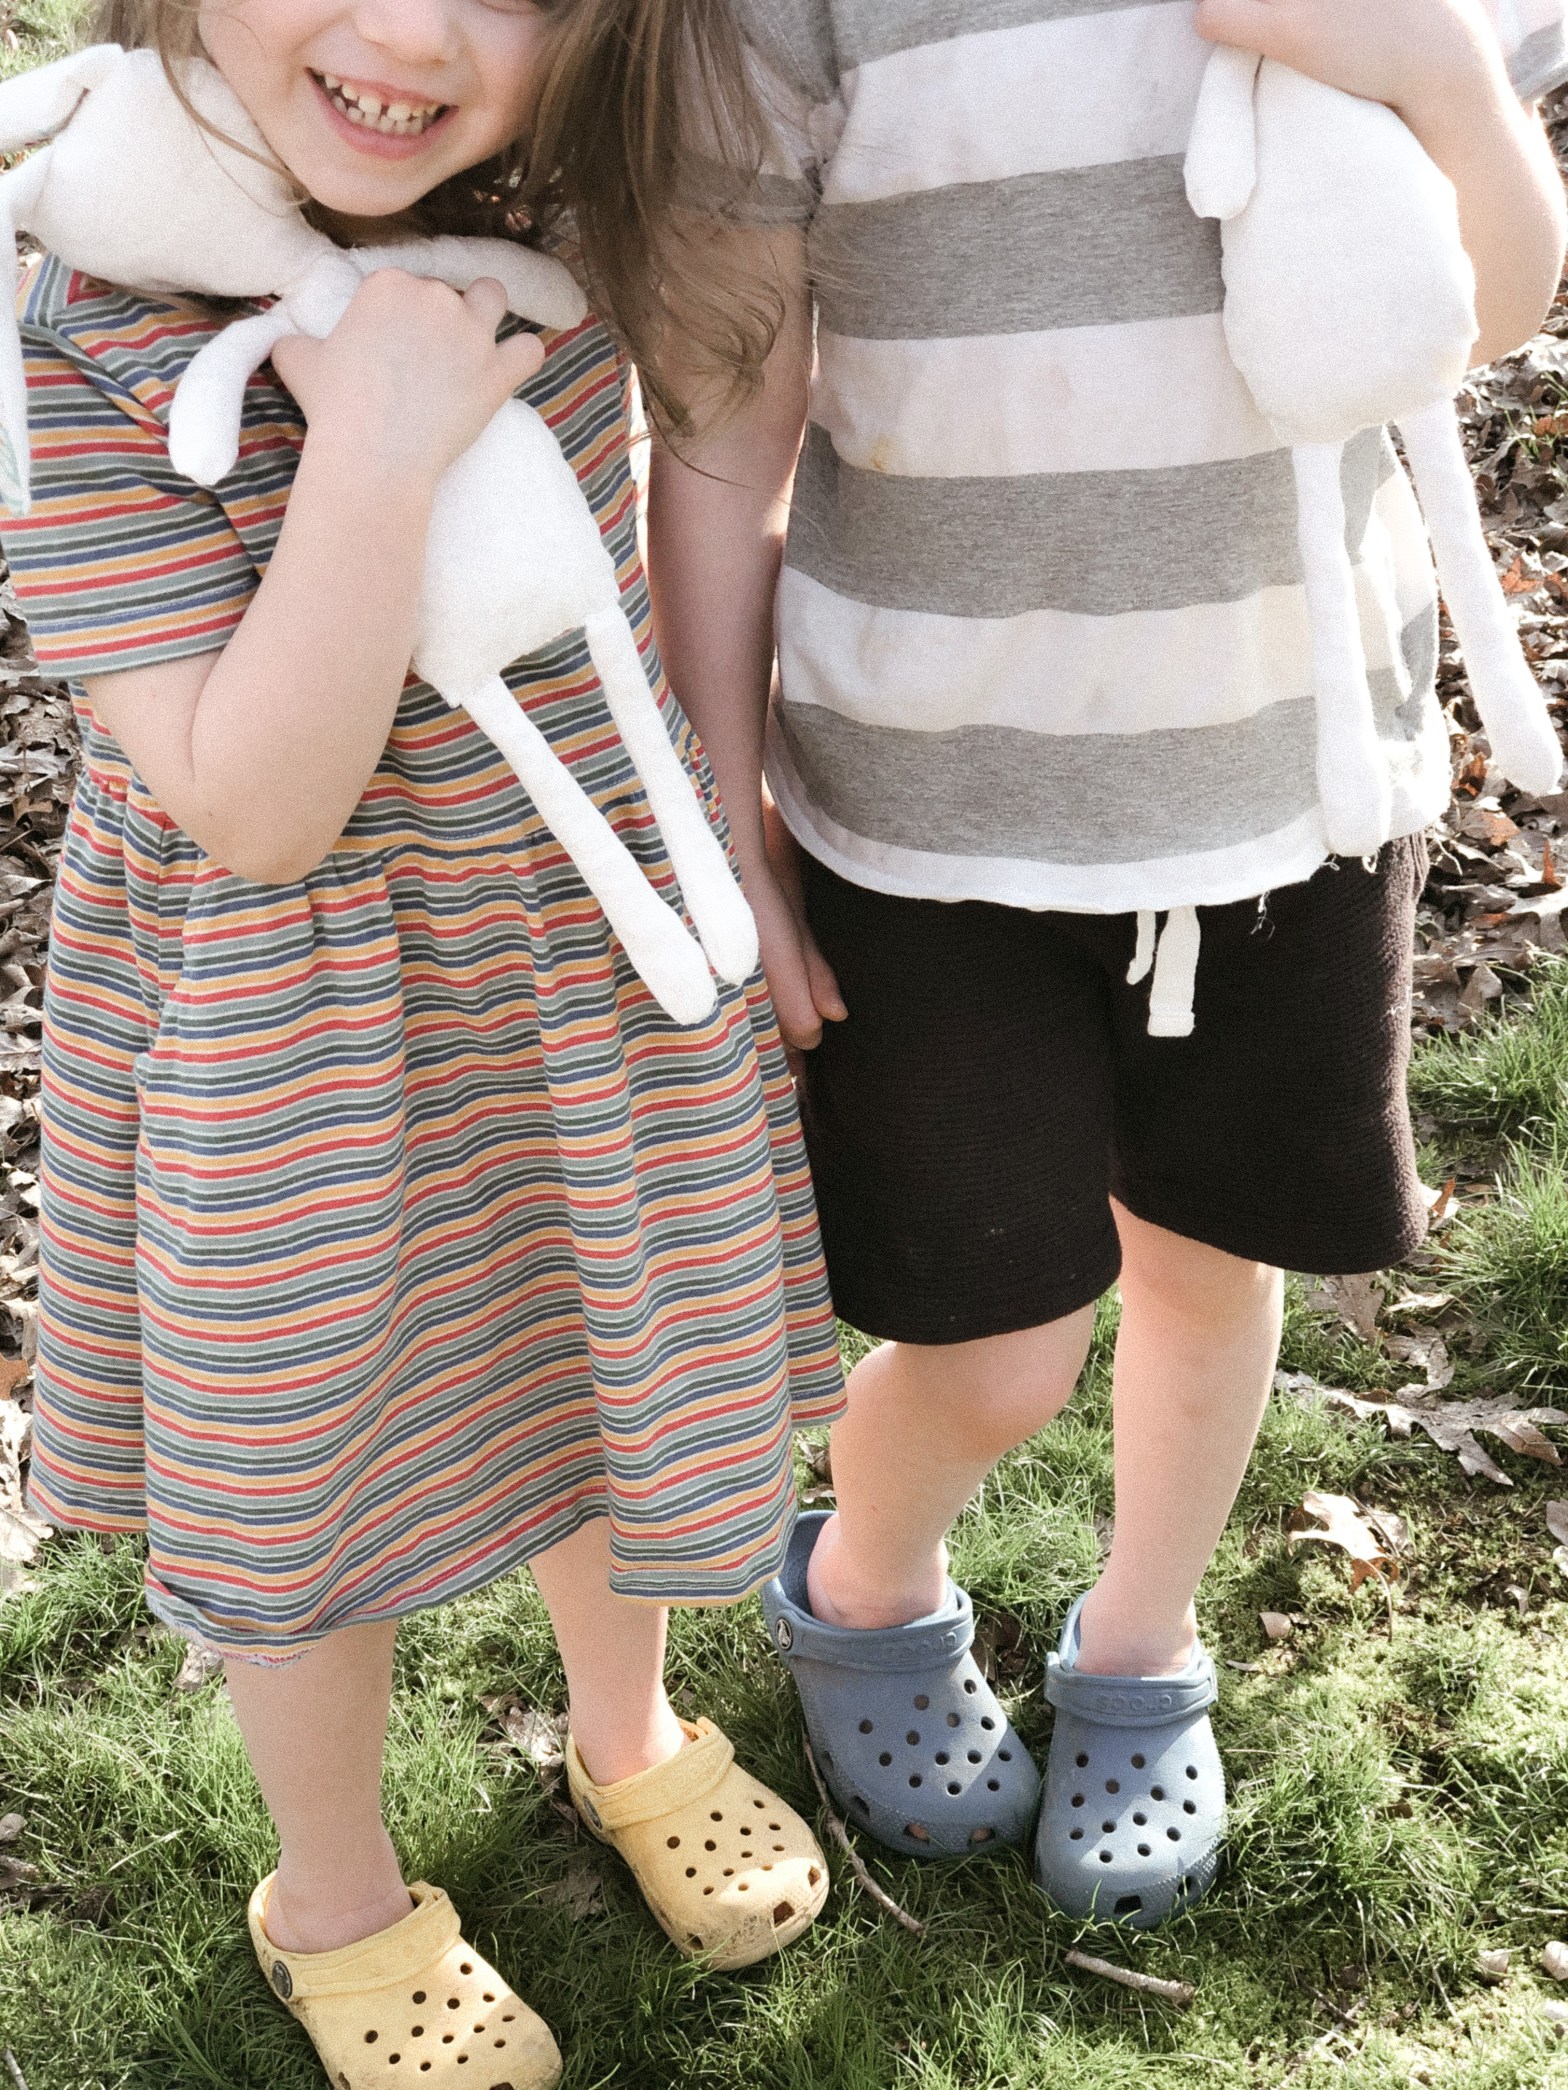
They saw their baskets today and were SO excited to have their own huge bar of chocolate. The bunnies were immediately snuggled and brought outside to play. Just remember, YOU are enough for your kids. The gifts and sweets are so fun and festive, but at the end of the day, it’s the intangible and often free things that shape their hearts and minds.

If you’re interested, here’s the process I followed to make the bunnies!
- Materials: 100% cotton fabric from goodwill clothes, cotton towels to line the ears, and cotton batting scraps and white fabric from my mom’s fabric stash.
- Steps:
- Trace the stuffed animal you’re using as a model with a 1/2 inch seam allowance onto paper (I improvised on the bunny ears as the original stuffy was a mouse).
- Cut out and pin pattern paper onto fabric, cut out fabric pieces (head/body, ears, towel insert, legs, arms).
- Trace face onto fabric with a pencil, then embroider the features.
- Sew together ears, stuff with towel pieces. Sandwich ear pieces between the head/body fabric pieces, right sides together. Sew around the head, leaving enough space for stuffing. Stuff the head. Sew around the body, leaving holes for the arms, feet, and a stuffing spot at the bottom.
- Sew limbs right sides together. Turn ride side out with a pencil and stuff with batting or fabric scraps.
- Turn the body right side out, pin limbs into place (in the holes left open previously) and hand sew to close the gap and secure the limbs.
- Stuff the final body stuffing through the hole in the bottom and hand stitch shut.
